Nerdina Kit: Advanced
The goal of Nerdina is to develop young women leaders in technology by learning about the technology around us, how it is built and how it works. In order for students to be prepared for leadership in technology, we need to gain a fundamental understanding of the building blocks. The present curriculum in schools is focused mostly on teaching coding to students and not adequately on imparting practical knowledge about the foundations of the digital world such as web technologies, networking concepts and microelectronics.
The Nerdina Kit and the YouTube videos on the Nerdinas channel aim to bridge that gap. The Nerdina Kit contains the items necessary for students to perform experiments and gain a practical understanding of the technologies that form the backbone of the digital world.
Nerdina Kit: What's Inside
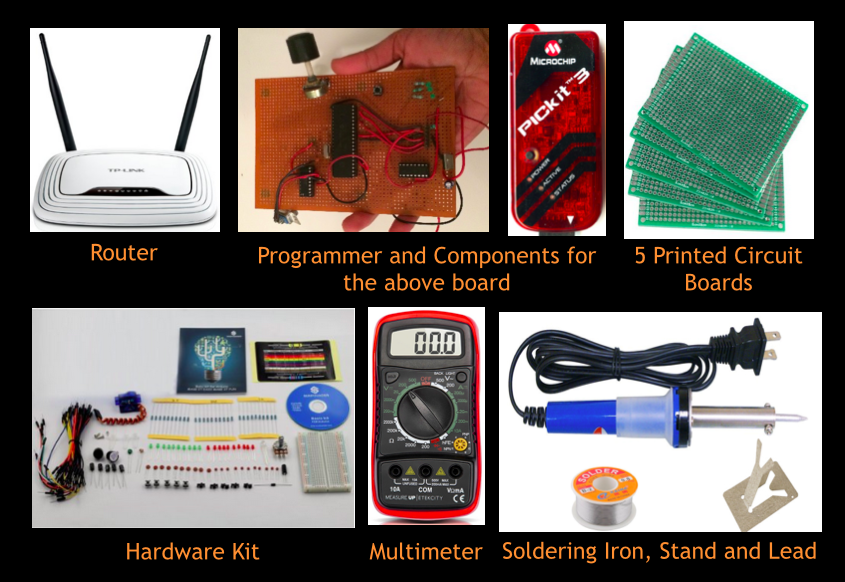
Build, Program and Solder your Own Board with a Microcontroller and 4 Experiments
Follow along with YouTube video tutorials (below) that will lead you through preparation and each of the four experiments.
It is recommended that you have prior experience building circuits and a supervisor who can provide assistance. If you have none or minimal experience, we recommend that you try out the Beginner or Intermediate Version of the Nerdina Kit first.
Preparation
In this video, we go over the set-up needed before beginning the four experiments. This includes soldering the microcontroller onto the board, setting up the programmer and also downloading the software needed to write programs.
Experiment 1: 3-Bit LED Counter
In this video, we go through the connections and program that are needed in order to complete the first experiment, which is a 3-BIT LED counter. In the experiment, 3 LEDs count from 0-7 with the number being displayed on the LEDs changing every second. This experiment includes a timer and gives insight into how electronic clocks and devices that keep time in general work.
Experiment 2: Switch-Controlled Motor
In this video, we go through the connections and program that are needed in order to complete the second experiment, which is a switch-controlled motor. When the switch is pressed, the motor spins.
Experiment 3: Computer Output
In this video, we go through the connections and program that are needed in order to complete the third experiment, which prints output (happy) to a computer when a switch is pressed and prints sad otherwise.
Experiment 4: Potentiometer Voltages
In this video, we look at the connections and programs that are needed for the fourth and last experiment using the PIC16F877A microcontroller. In the last experiment, the variable voltage from a potentiometer is outputted to a computer screen in realtime. I hope you have enjoyed making this board.
Interested in Receiving a Nerdina Kit?
Would you like to receive a Nerdina Kit for your school? Email INFO@NERDINA.ORG with information about yourself and school and tell us why you would like to start a Nerdina Club. If you would like the Nerdina Kit to perform experiments on your own, tell us a little about yourself and why you would like a kit. You may even qualify for a free kit!
NERDINA © 2016 | ALL RIGHT RESERVED